Understanding Soil and Footing Layout
The first step in a solid deck foundation is understanding the soil conditions. Engineering principles tell us that soil bearing pressure plays a vital role in determining the type and size of the footings required for your deck. Calculations and building codes help establish the more specific footing sizes, and the 2021 International Residential Code (IRC) Table R507.3 offers us tables that we can use to determine those sizes based on soil type, load rating, and the area that the post supports.
So how do you determine the soil’s bearing capacity? While a professional soils report is often the gold standard, you can also use other means, including a soil penetrometer or even local building codes and maps listing common soil types and capacities based on region and history; each of these means may offer a reasonably accurate way for you to establish your soil strength.. Armed with this information, you can begin planning your footings.
For footing layout, a detailed plan is the best approach, but if that’s not available, the “3-4-5 Triangle Rule” can help ensure accuracy when marking footing locations. This method uses a triangle with side lengths in a 3:4:5 ratio, which creates a right angle where the sides with the “3” and “4” lengths, ensuring a footing layout that will be square and true to the face of the home. Proper footing layout guarantees an even load distribution across the deck’s posts.
Code-Compliant Footings and Concrete Strength
The IRC (Section R403.1.1) and the North American Deck and Railing Association (NADRA) stipulate that footings must penetrate at least 12″ below undisturbed ground to provide a stable base. In areas prone to freezing, footings should extend below the frost line to prevent shifting. The minimum dimensions for footings are 12″ x 12″ square or 14″ round, with concrete strength not less than 2,500 psi. If you’re not ordering from a batch plan, ensure that your concrete mix is stiff by making sure it holds form when shoveled or is not soupy when poured.
Embedding your post directly in the ground is not typically recommended due to the risk of post rot. However, if you do choose this route, make sure the posts are pressure treated (minimum UC4B) and use stainless-steel post bases to resist moisture-related issues.
Post Bases and Anchoring
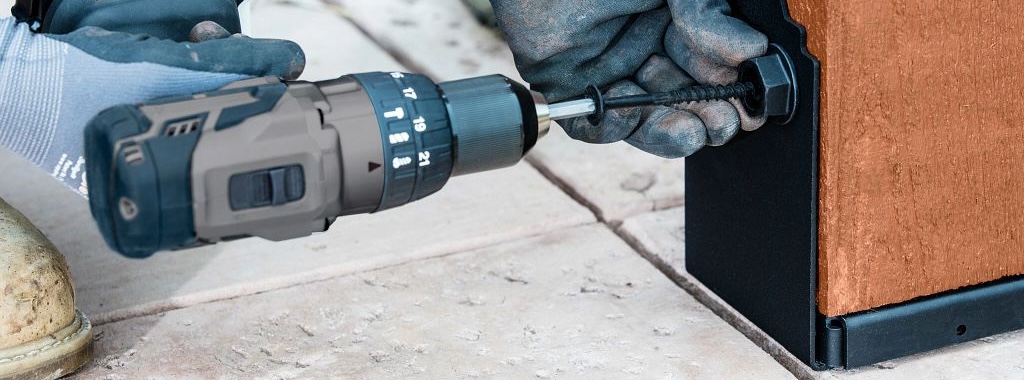
Proper post anchoring is essential to resist loads and prevent lateral displacement. The IRC and NADRA both specify that posts must be securely fastened to footings using metal post bases. This ensures a stable connection that prevents the post from shifting under load. It’s critical that the post be raised above the ground to protect against moisture and decay. Using a metal post base with a 1″ standoff helps you achieve the necessary elevation for your post.

For post bases installed on existing concrete, product options such as Simpson Strong-Tie® SET-3G™ or AT-3G™ anchoring adhesives Titen HD® screw anchors, or Strong-Bolt® 2 wedge anchors all offer reliable solutions. Post-installed anchoring can be used with the ABU, ABW, and EPB post bases, or the CPTZ® concealed post base.
For posts to be installed in poured concrete, there are cast-in-place post bases. The PBS, PB, PPBZ, CBSQ, and MPBZ™ are all options for these conditions when the post base is secured and integrated with the formwork and rebar prior to pouring the concrete. Regardless of the method, always ensure the post base is level and square during installation.
Post Sizes and Notching
When selecting post sizes, the minimum post size for deck supports should be at least 4×4 per the IRC for standard gravity loads. However minimum post size varies depending on the height of the deck and the code guidance being referenced, and 6×6 posts are often required. This size provides more strength and flexibility, especially when making connections to beams. This is what the different standards say:
- 2021 IRC: Table R507.4 offers the opportunity to use 4×4 posts depending on the height of the deck post. This table offers 4x4s up to 8′ if they are only supporting gravity loads, but when lateral load needs to be resisted, the maximum height for a 4×4 post decreases to ‘3″.
- NADRA: This document is pretty clear in that all posts supporting deck beams must be a minimum of 6×6.
- DCA 6: Under ‘POST REQUIREMENTS’’ it states that “All deck post sizes shall be 6×6 (nominal) or larger and the maximum height shall be in accordance with Table 4.”
Can we notch the deck posts? Like minimum post sizes, there are varying requirements depending on what code is being referenced. Here’s what the different codes say:
- IRC: Notching is allowed and graphics are provided that offer detailing for this install. See 2021 IRC, Figure R507.5.1(2).
- NADRA: This document is very clear in Section 5c that “Posts shall be connected to the beam with a connector sized for the connection.” And that ‘NO NOTCHING IS PERMITTED.’
- NDS: Section 3.2.2 has a minimum dimension that is allowed to be notched, and if you use the width of a double 2x (3″) as your benchmark, you will exceed this code minimum. So NDS says you can’t notch posts.
- DCA 6: Notching of 6x posts is permitted up to a two-ply, 2x beam. All three-ply beams or wider must be connected to the post by a post cap.
Cut ends and notches of posts are more susceptible to rot and decay because of the exposure to moisture and pooling water. Because of this, they must be field treated with an approved preservative to prevent decay. The minimum treatment should be AWPA M4 wood treatment. Notched posts can lead to long-term structural issues if not properly treated.
The Importance of Post-to-Beam Connections
A proper post-to-beam connection is crucial to maintaining the integrity of the deck. The IRC (R507.5.2) and NADRA recommend using metal connectors to ensure a secure connection between the post and the beam. Again, notching posts to facilitate the connection is often not permitted due to the increased risk of moisture-related decay.
Instead, consider using metal post caps such as the AC, ACHZ, BC, BCS, CCQ™ series, LCE, LPC, or PCZ® post and column caps for solid beams or multi-ply beams. These connectors, along with appropriate fasteners, maintain a continuous load path and resist uplift and lateral loads. Through-bolting side beams to the side of the post is not allowed, but if you wanted this look, you could consider using the DJT deck joist tie with structural screws to connect a 2x pair to the sides of the post, since these are tested connectors that provide the required bearing area.
Diagonal bracing is required by the IRC and by NADRA to connect the post to the beam when the deck is more than 2′ above grade. You can attach diagonal braces using metal connectors such as the KBS1Z or wood screws.
Conclusion
Building a deck is a complex task that requires careful planning and adherence to building codes to ensure safety and durability. By understanding the fundamentals of footing design, post anchoring, and post-to-beam connections, you can create a deck that not only looks great but also stands the test of time. Remember, it’s always best practice to know what standard is being followed in the jurisdiction where you’re building. This enables you to create a code-compliant deck with a solid, long-lasting foundation.